The arrival of spring means many things. Warm weather, turkey season, and trout fishing to name a few. But for a brief window, spring also means ramps are on the menu. Ramps are a garlicky, scallion-like edible plant. For roughly six to eight weeks, they can be found and enjoyed in the eastern United States and Canada.
People have been gathering and eating ramps for hundreds, if not thousands of years, but they’ve become extremely popular in the last decade. Trendy chefs, “foodies,” and social media influencers have exploded their popularity in recent years. Eaten raw, or incorporated into a favorite recipe, ramps are delicious, and hunting for them is an accessible way to get into foraging. But don’t wait too long, because they’ll be gone before you know it.
Ramps, also known as ramson, wild leek, or spring onion, are a species of wild onion. They have two long oval leaves that stick up from a submerged white bulb. While there are several varieties of ramps in the U.S., and a few related plants in other parts of the world, their appearance and flavor are mostly similar. Variation between the species typically expresses itself in minor differences in flavor, size, and hue. Some varieties are spicier than their relatives, or their leaves and bulbs might be a different size or thickness than others.
Ramps have three leaves that smell like garlic. Cosmo Genova
As with many wild foraged foods, there are a few poisonous look-alikes to ramps, but it’s generally not something you need to worry about. If you’re ever confused, the garlicky smell of ramps is a dead giveaway that you’ve found the right plant.
When Are Ramps in Season?
Some of the hype around ramps comes from their short window of availability. Ramps come around for the first few weeks of spring in the eastern and central U.S. and Canada. Their season only lasts for roughly six to eight weeks, usually popping up in early to mid-April, and gone by about the first week of June.
Where Can You Find Ramps?
Ramps usually grow in patches of various sizes depending on the age, soil quality, and how undisturbed the patch is. It’s hard to pin down what exactly the perfect ramp habitat looks like, but some anecdotal knowledge can go a long way. I’ve most often found ramps on shaded hillsides adjacent to areas with a lot of natural drainages, which turn and almost till the soil.
These moist, rich soiled areas—as well as shaded areas near streams and rivers—seem to be the most consistent for finding ramps. Ramps prefer wooded areas over open, flat ground where the soil is dry and sandy or too compact. I usually stumble into ramp patches near the banks of trout streams and on hillsides where turkeys roost. The key to finding ramps is to simply cover as much ground as possible until you find them, then look for similar areas and features to help narrow your search for new patches.
Picking too many ramps out by their roots can shrink a ramp patch, but it’s OK to do sparingly if there are a lot around. Cosmo Genova
If you can’t find ramps in the woods, you can often find them sold at farmers’ markets and even some grocery stores when in season. Some restaurants even serve locally harvested ramps on their menus. If you have friends with property, it’s worth asking permission to look for ramps. Many states prohibit foraging for wild plants in state parks and federally managed lands, so make sure you check the local regulations before going picking.
A ramp patch is a perennial resource you can visit every year if managed sustainably. Ramps take years to reach maturity and a large patch can take decades to flourish. That’s why it’s important to practice sustainable harvests to ensure the health of the patch for years to come. In general, it’s best to either only pick the leaves, or to cut the bulb above the root, leaving enough of the plant for it to continue growing. If you have multiple large patches to harvest from, it’s alright to sparingly pick the whole plant in some cases as long as you make sure not to pick an area too thoroughly. Try to avoid picking the whole ramp from small offshoot patches adjacent to a large patch so that they can continue to propagate.
What Do Ramps Taste Like?
The flavor of a ramp is best described as hot and garlicky, especially when eaten raw, with the leaves usually a bit milder than the bulbs. When cooked, the hotness and strong garlic-forward flavor of the ramp are subdued considerably. The raw bulbs have a high water content, giving them a nice crunchy snap that’s a bit crisper than a garlic clove or a scallion. The texture of ramp leaves can be best described as spinach meets grass—but in a good way.
It’s hard to miss the sight, and smell, of a big ramp patch. Cosmo Genova
How to Cook with Ramps
The culinary possibilities of ramps are endless. This versatile plant can be cooked whole or incorporated into other dishes. Pretty much anywhere you might use onion, garlic, shallot, or scallions, you can substitute or add in ramps.
Both the leaves and bulbs can be sliced and used as a garnish. I’ll often grill ramps whole and serve them alongside grilled meat or fish. You can also make fermented dishes like kimchi with whole ramps. The leaves can be used to make pestos, vinaigrettes, chimichurri, and other sauces and condiments. You can even use the leaves in the same ways you use other vegetables in recipes like Korean-style scallion pancakes, Japanese okonomiyaki, fried vegetable fritters, and things like that.
The bulbs are great when pickled whole or they can be used like pearl onions. Ramp butter is also an absolutely delicious way to use ramps, and can be eaten on everything from steak to pasta, or even just spread on toast. I like to cook ramps in biscuits, bread, and focaccia as well.
You can use ramps in just about any recipe that calls for onions, garlic, or leeks. Cosmo Genova
Don’t read this article if you’re scared of sharks. Marlin Wakeman, a 24-year-old fisherman and charter boat deckhand, recently fell into water infested with 20 sharks—and lived to tell the story.
On Friday, April 26, he was at the Flying Fish Marina in the Bahamas. Sharks are known to congregate at the marina and feed on fish scraps thrown from the docks and fishing boats. That day, a large group of sharks was swimming around the docked boats, looking for an easy meal.
“Me and my buddies were talking about [how], ‘Man, if you fell in here, you are done,’” Wakeman said at a recent press conference. And that’s exactly what happened to Wakeman. His foot slipped as he was jumping from the dock onto a boat. He fell into the water with at least 20 sharks. A 7-foot Caribbean reef shark quickly sunk its teeth into Wakeman’s left leg.
“I ended up in a shark den…I wasn’t really scared at the moment. I just knew I had to get out as quickly as possible,” said Wakeman. “I was pulling myself back in, and [the shark] grabbed my leg and pulled me underwater.”
After a short struggle, Wakeman was able to start pulling himself up onto the dock despite also being attacked by a second shark, which grazed his right leg. Once he made it out of the water, his boat’s captain tied a tourniquet to his leg and sent him to the nearest medical clinic.
“It was a lot of pressure, but I didn’t feel any sharpness [at first]. You don’t really feel the teeth going into you,” said Wakeman, who noted the worst pain came on the ride to the clinic. “That was the first time I’ve ever passed out strictly from pain, so yeah, it hurt really, really bad.”
After his wounds were stitched up, Wakeman was flown to West Palm Beach for treatment at St. Mary’s Medical Center by Dr. Robert Borrego, who’s an expert at treating shark attack victims.
“It shocks me that he was able to get out of that water,” Borrego, who has already treated three shark attack victims this year, said. “The fact that there were 20 sharks in there, and he was able to get out and still have a leg is amazing.”
After Wakeman’s wounds were stabilized, Dr. Borrego gave him a spectrum of antibiotics to prevent infection. Wakeman is expected to make a full recovery.
Trapping is a vital skill for survival and sustainable living in the wilderness. Among the various traps, deadfall traps stand out for their effectiveness and simplicity. These traps use the weight of a heavy object to dispatch prey quickly and humanely. This article will explore three popular deadfall traps: the Split Stick Figure 4 Trap, the Paiute Deadfall Trap, and the Split Stick Deadfall Trap. Each type has its unique build and application, tailored to different environments and target species.
1) The Split Stick Figure 4 Trap
The Split Stick Figure 4 Trap is a precision-engineered variant of the classic Figure 4 trap. It’s designed for reliability and sensitivity, using a split stick configuration to enhance the ease of carving this trap. After teaching many people how to do a regular Figure 4 trap, a friend showed me this split-stick variation. Carving this one, especially for beginners, is much easier and equally effective.
The author completes a split stick figure 4 trap. Jennifer Caudill
Materials Needed:
A heavy, flat rock or log will serve as the portion that falls prey in the trap. This can be small for small prey like small rodents, or much larger for mid-size game animals.
Find a stick about twice the length of your rock or log and a large enough diameter to hold the weight.
A good bushcraft-style knife for carving carve it.
Step 1: Choose a straight stick without too many knots. It should be about twice the length of your deadfall portion. Cut a piece slightly taller than the animal you expect to catch in the trap and split it into two equally thick parts. Those will be Sticks 1 and 2.
Stick 1 (Vertical Post): Carve one end into a flat, sharp edge. This is often called a “shovel” point because it can be used on giant sticks as a digging tool.
Stick 2 (Angled Stick): Carve shovels on both ends of this stick and a 7-notch 1/3 of the way down one end.
Stick 3 (Trigger Stick): Carve a 7-notch at one end to fit into Stick 2, cut a 90-degree L-shaped notch to match the vertical post, and a point at the other that will hold the bait.
Step 2: Assemble the trap. Position Stick 1 vertically on the ground. Place Stick 2 with the flat end resting beneath the deadfall rock and the notched end catching the sharp edge of Stick 1. Insert the notched end of Stick 3 into the notch of Stick 2, ensuring it is secure and sensitive to touch.
Step 3: Set the trap. Place your bait on the pointed end of Stick 3. Bait for traps should always attract the animal you want to attract. General baiting is only minimally sufficient here. Gently set your rock or log on top, balanced precariously by the interconnected sticks.
Step 4: Test the trap. Tap the bait stick lightly to ensure the trap disengages easily and the rock falls promptly.
2) The Paiute Deadfall Trap
The Paiute Deadfall Trap, which originates from the indigenous Paiute tribes of North America, uses a susceptible trigger mechanism, making it ideal for more minor game-like rodents.
A completed Paiute trap. Jennifer Caudill
Materials Need:
A flat, heavy rock or log large enough to bear the weight of your deadfall
A length of cordage about twice the length of your deadfall
A smaller-diameter stick the length of your deadfall
Stick 1 is the vertical post will be flat on the bottom and use branches as a “Y” at the top.
Stick 2, the angled stick, will be flat on both ends. I carved a notch on the end to securely hold the cordage on the stick.
Stick 3 is the small trigger that will be attached last with cordage.
Step 2:Assemble the trigger system.Attach the cordage loop to the notched end of the vertical stick. Thread the other end of the cordage through the notch of the horizontal stick and tie it to the small trigger twig.
Step 3: Set the trap. Place the vertical stick under your deadfall, ensuring it stands firm. Balance the horizontal bait against the vertical stick, securing the cordage to be taut. Place the trigger twig perpendicular to the horizontal bait stick with the bait attached.
Step 4: Fine-tune and test. Adjust the tension in the cordage to ensure the trap is sensitive yet stable. Test the mechanism by gently touching the trigger twig to ensure the rock falls smoothly.
3) The Split Stick Deadfall Trap
A split-stick deadfall trap is set and ready to gather a meal. Jennifer Caudill
This trap is a simplified version of the Split Stick Figure 4, using fewer components and a more straightforward setup. It is ideal for quick survival situations.
Materials Needed
A large, heavy rock or log
One stick that is thick enough to hold the weight of your deadfall trap.
A thin stick is to be used as a bait stick.
A knife for carving
Step 1: Carve your sticks. Split your thick stick into two equal pieces. Ensure the cut is at a 90-degree angle to the stick. Cut one of your trigger sticks to a skinny thickness. Make sure it is not at an angle. The other should be equal in thickness.
Step 2: Set up the trap. Lay one stick flat on the ground and place the other on top, ensuring the two ends match securely. Place the thin carved stick between the two upright pieces.
Step 3: Place the deadfall. Set your rock or log on the sticks’ interlocking point, ensuring it’s unstable enough to fall at a slight touch. You can easily place another flat rock on the ground to ensure this (and the other) deadfall trap kills the animal quickly.
Step 4: Bait and test the trap. Attach bait to the bait stick, ensuring it’s enticing and easy to access. Test the stability and sensitivity of the setup by gently prodding the bait stick.
Other Things to Consider for Survival Traps
Where to Set Traps and How to Bait Them
Building the trap is one-third of the process of building deadfalls. The second part involves proper placement along known or likely game trails or wildlife corridors. That last part is bait. In general, animals are attracted to the smells of the food they prefer and to the scat or hair of other animals. They will investigate to determine what the other animals are doing. You can also purchase or gather attractants from trapping suppliers, including urine and other scent attractants.
Legal Considerations
Before setting up any primitive snares or traps, it’s crucial to understand the local regulations. In many regions, such practices are strictly regulated or even prohibited. Always ensure you have the appropriate permissions, like a hunting license, to avoid legal issues. Check with your local wildlife management authority to understand your area’s rules and regulations.
Regional Restrictions
Some regions have specific prohibitions against certain types of traps and methods. For instance, it’s illegal to use pits, pitfalls, nets, poison, and certain types of mechanical traps. Before planning your trap setup, always verify whether specific methods are allowed in your locale.
Whether you want to hone your wilderness survival skills or engage in a challenging outdoor activity, building a non-lethal deadfall trap offers both. You can enjoy this practice responsibly by respecting local wildlife regulations and adapting traditional trapping techniques to modern ethical standards. Always aim for humane methods that minimize animal harm while allowing you to develop essential survival techniques.
A Montana shed hunter escaped a harrowing bear attack thanks to quick thinking and good marksmanship. According to a Montana Fish, Wildlife & Parks (FWP) press release, a man was shed hunting on private property near Wolf Creek, Montana, on April 25 when he encountered a grizzly.
“The man was walking along a ridge covered with low trees and brush with his two dogs at his side and the wind at his back,” explained an FWP spokesperson. “After seeing a fresh grizzly bear track in a snow patch, he continued along his path and a few minutes later, he first saw the bear standing near the top of the ridge about 20 yards away.”
What happened next is the stuff of nightmares. The grizzly sow immediately dropped to all fours and charged. Thankfully, the man, whose identity has not been released, was carrying a handgun for self-defense. He fired five shots off at the bear, grazing it with one bullet and dropping and killing it with another. According to the FWP, the bear charged from 30 feet to 10 feet before it was killed.
The man was uninjured in the incident. The female grizzly appeared to be in good health and weighed around 300 pounds. It was estimated to be 12 years old. FWP officials reported to the scene of the incident, where they located and captured a lone cub-of the-year. The cub was taken to a licensed wildlife rehab center and will likely be placed at an accredited zoo. Because grizzlies are still considered endangered in the Lower 48, the U.S. Fish and Wildlife Service is also investigating the incident.
Grizzlies bears can grow up to 500 pounds. Today, Montana is home to the largest population of grizzlies in the Continental U.S.—and the state’s grizzly population is spreading into central Montana. Sows with cubs are known to be territorial and aggressive when defending young, which appears to be what spurred the recent incident.
As a serious outdoorsman, one of the most practical survival skills I’ve explored is crafting a torch from natural resources. In this guide, I’ll focus on one of nature’s readily available materials—cattails. Found commonly throughout North America in wetlands, marshes, and along pond edges, cattails provide sustenance and insulation and can be transformed into a useful, if temporary, light source. Here’s a detailed step-by-step guide on how to make a torch from cattails, an invaluable skill for outdoor adventures or emergencies.
The best time to gather cattails that are suitable for torches is in the summer. Jennifer Caudill
Step-by-Step Instructions on How to Make a Survival Torch
Step 1: Collect the Necessary Materials
The most easily recognizable portion of cattails is the brown seed head that resembles a corn dog. Each seed head contains thousands upon thousands of tiny parachute-like seeds that float away when completely dry. In early spring, the seed heads are green and can be eaten like corn on the cob. Avoid the green seed heads and go for the completely dry brown ones. The best time of year for this is late summer. However, you can find loosely formed seed heads deep into winter.
The stalks of cattails make great hand-drill materials but are terrible at holding the seed head after it is lit. You will want something more substantial to hold it and last without burning. An obvious choice is a stick, preferably a hardwood like oak, ash, or hickory. There is no need to cut them green for this. The stick will last longer than the dried seed head. Another fantastic choice is rivercane when it is available. Rivercane is much smaller than bamboo in diameter. Several pieces fastened together make their torch on their own, coupled with a cattail seed head, and you have a torch that can last for several hours.
I prefer a solid wire to fasten the head to the handle, but string will work as it will burn as the seed head burns away.
Animal fat or plant oils work best. You can use rendered fat from a game, or purchase tallow or lard. If you use commercial, grocery-store oils, get one with a high percentage of plant oils as they burn cleaner with less smoke than others.
The author holds a bunch of brown cattail heads. Brown ones burn best. Jennifer Caudill
Step 2: Preparing the Cattail Heads
Select a few cattail heads. The fluff inside is what will catch fire, so you want it to be dense and dry. Carefully pull them from their stalks without dispersing too much of the fluff. If they are slightly damp, let them dry in the sun for a few hours before using them. The tighter and more intact they are, the longer they will last. You will want to pull a bit up the tails (fluff) from the top to get the torch started, but otherwise, use the tightest and driest heads you can find.
Step 3: Attach the Cattail Head to the Stick
Take your stick and sharpen one end slightly, making it easier to insert into the cattail base. Push the sharpened end into the base of the cattail head. Ensure it’s secure, but avoid pushing it so far that it exits the top of the head.
Next, use your string or wire to tie the cattail head securely to the stick. Wrap the material several times around the base of the cattail head where it meets the stick, tying it off firmly to prevent the head from falling off when the torch is in use. The seed heads will provide some insulation around the stick so it does burn through. If you make this with river cane, be careful as you place the seed head on the cane. Indigenous people have used sharpened river cane for thousands of years as a discardable knife. Sharpen it, use it till dull, then cut another. It will easily slice your hand or pierce through it if you don’t use caution.
Step 4: Applying the Fuel
It’s time to make your torch last longer by adding a fuel source. Coat the cattail head generously with your chosen fat or oil. Ensure the fluff is thoroughly saturated; this increases the burn time and produces a steadier flame. I often let them soak in the oil overnight and then drip dry the excess.
Be careful with lighting your cattail torch; it’ll ignite quickly. Jennifer Caudill
Step 5: Lighting Your Torch
Before you light your torch, ensure you’re in a safe outdoor area clear of overhanging branches and other fire hazards. Light the tip of the cattail head using a match or lighter. The torch should ignite quickly and start to produce a steady flame. Hold the torch away from your body and anything flammable. Depending on how well the cattail head was prepared and the type of fuel used, your torch can last from 15 minutes to potentially over an hour. Remember that thousands of seed heads are on fire at this point. They will often fall away from the torch, so ensure the area underneath is clear of flammable debris. In windy conditions, use extreme caution when using them as sometimes the seed heads will catch and “fly” away from the source.
Step 6: Safely Extinguishing Your Torch
Once you have finished using the torch, extinguish it safely. If you’re near a water source, you can dunk it into water. Otherwise, smother the flames with dirt or sand until you are sure it has been completely extinguished. Never leave the torch burning unattended or dispose of it while it’s still lit.
Bonus Tips on Making a Survival Torch
Multiple Heads: For a brighter and longer-lasting torch, you can attach multiple cattail heads around the stick or cane, creating a larger flame.
Handling: Always keep the torch upright to prevent the molten fuel from dripping onto your hands or the ground.
Storage: Prepare several torch heads in advance and store them in a dry place for quick use. The oil will leak off when it warms up, which can happen in a vehicle or truck bed. Wrap the head in a resealable bag to keep it from leaking into your vehicle, pack, or tote box.
Final Thoughts
Making a torch from cattails is a simple, effective way to illuminate the dark when you’re out in the wilderness. This method connects us to ancient practices and underscores the importance of understanding and utilizing natural resources responsibly. Whether camping, exploring new trails, or needing emergency light, a cattail torch can be a lifesaver. Fire safety is paramount, so always use your torch responsibly and ensure it’s fully extinguished after use.
A wild video clip recently posted to Instagram shows a herd of caribou stampeding toward a pickup truck on a remote stretch of dirt road in central Alaska. Driver Clinton Kerns told Viral Hog that he’d stopped the truck to observe the 100-animal herd from a distance when the caribou turned on a dime in unison and began charging at his truck.
“Here’s the caribou herd,” Kerns can be heard saying with the critters coming straight for him. “This isn’t good,” he adds, blaring the horn and yelling as the animals get increasingly closer. Suddenly, the herd splits with half the caribou splintering off to the right of the truck and the other half veering left. “Yeah, let’s go the other way, guys,” Kerns tells them.
According to Kerns, the behavior in the video is extremely uncommon behavior for caribou, which are normally cautious in the presence of people. After the video cuts out, the animals milled around for a bit and then moved down to a nearby river to join another groups of caribou, he told Viral Hog.
The incident took place just outside of Fairbanks, Alaska on April 22, and Viral Hog shared it on the internet yesterday. In the springtime, caribou herds migrate north toward calving grounds and summer ranges, sometimes moving en masse by the tens of thousands.
According to the U.S. Fish & Wildlife Service, Alaska is home to 32 different caribou herds, and each one is defined by its distinct calving grounds. One of the largest herds near Fairbanks is the Fortymile Herd.
The Alaska Department of Fish and Game (ADFG) says the Fortymile Herd became so large in recent years that it outgrew the carrying capacity of its habitat. Hunters were then called upon to reduce the population through increased harvest rates. As of 2023, the caribou quota for the Fortymile Herd has been reduced to more normal bag limits, typically one bull caribou during the fall and one bull caribou during the winter for each hunter.
On December 10, 2021, my hometown of Dawson Springs, Kentucky, was hit by one of the deadliest tornado outbreaks in U.S. history. It’s estimated that 75% of the town was destroyed in just 10 minutes by an EF4 tornado, which killed 14 people out of a population of just 2,500. I live about an hour away, and our home was narrowly missed by a separate, EF3 tornado that spun out of the same system. We had roofing shingles in the yard and a power outage that lasted most of a week but were otherwise sparred serious damage, as were my relatives who still live around Dawson. But we did learn a thing or two about tornado safety and being prepared for the worst.
I know people who were injured in the storm, a few who died, and many who lost their homes. What I saw during cleanup efforts in the days after the storm fundamentally changed my perspective on many things. Some of the preparations we’d taken ahead of December 10 kept us comfortable in the aftermath, when the power was out and we were on our own. I’m glad I had at least some of the tools and experience needed to help a few people in need. But I’m even more thankful that my ignorance—and even dismissiveness—of a tornado’s power didn’t get my family killed. Yeah, we’ve always had tornados around here, but they had admittedly been a curiosity of mine prior to December 10, and I never took watches and warnings or tornado safety advice too seriously. That has changed.
I’m not about to frame myself as an expert on tornados or recovery efforts. But I’ve seen people lose everything, and I know what the chaos in a small town looks like in the days after a storm. I can promise you, being prepared is better than hoping for the best. These days, when they’re talking about tornado chances on TV—which happens a lot this time of year—these are the 6 keys things I’m thinking about.
Tornado Safety Rule No. 1: Survive the Storm
First and foremost, make sure you have a safe place to go if a tornado touches down. Limitless Production / Adobe Stock
Some of the homes in Dawson Springs had basements, and many residents rushed to gather neighbors and relatives into those basements just before the storm hit. That saved lives. Other people had to seek cover wherever they could find it, in bathtubs, hallways, and bedrooms. CNN interviewed a resident who wrapped her two young children in her arms in her bed. They were thrown some 200 feet from their house in what she described as “a millisecond,” but they miraculously survived.
When the storms hit, we were at my hunting camp, in a metal-sided shop house built on a slab, and I’d parked my truck inside the garage. When the warnings came, we sheltered there, because it’s all we had. After seeing the ruins of full-sized pickups like mine tossed into trees and shop houses rendered into splinters, I realized just how vulnerable we were.
We invested in an above-ground steel storm shelter immediately that spring, and it’s anchored into the concrete slab with massive lag bolts and rated to withstand an EF5 tornado. The installer assured me that if our shop house was hit by a tornado, the slab and that shelter would be the only thing left standing.
If you have space for a storm shelter, either above ground or below, consider investing in one. If not, don’t be shy about talking to a friend or neighbor who does have one, or a basement, so you and your family have a safe place to hole up until after the storm has passed. I promise, nobody in Dawson Springs would tease you for taking the extra tornado safety precaution.
Tornado Safety Requires Communication
An American flag stand amidst the aftermath of the December 2021 EF4 tornado in Dawson Springs, Kentucky. Will Brantley
We have a portable NOAA weather radio that stays plugged into the wall and will also run on batteries. Such radios are inexpensive, and I consider them mandatory, since, when programmed, they can sound tornado warning alarms loud enough to wake the house.
As you’d expect, cell phone and landline service were both cut within seconds in much of the area. But we’re used to spotty phone service around here anyway, and so we’ve long used the WiFi calling feature on our phones to make day-to-day calls. And thankfully, we’d recently upgraded to fiber-optic internet (a service that’s unfortunately still not available in many rural areas). Because those fiber optic lines were underground and the service center was intact, we had internet access as long as we had power—which meant we could make calls, watch the news on television, and keep up with the radar on our phones.
Of course, that did no good outside the range of our WiFi router. It took about two days for emergency service to be established with mobile cellular stations in the disaster area, and even when it was, the service was spotty at best. Texts worked better than calls. The point is: Understand what services may be lost in a tornado and make the best plan you can for how you’ll communicate and stay updated after a storm.
Keep the Power On After a Tornado
A good generator is one of the most important tools you can own for country living. Small units, like my Yamaha EF2000i inverter generator, are perfect for running power tools, lights, and a few small appliances, including sensitive electronics. They’re also portable, quiet, and fuel efficient.
But a small inverter generator doesn’t have enough juice to keep you comfortable during an extended power outage. We experience frequent outages around here anyway, and so we’d already had our home wired by a licensed electrician with an auxiliary power transfer switch.
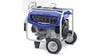
He also built us a custom locking power cord to connect to a Yamaha EF7200D industrial-sized generator. When the power goes out, turning it back on is as easy as plugging the cord into the transfer switch outlet, starting the generator, and then flipping the auxiliary switch.
The Yamaha EF7200D or similar generator will power everything you need to get by comfortably after a storm. Yamaha
Standard generators like the 7200D are heavier (though most are on wheels) and louder than inverter generators, but you can get way more power for the money, and they still are somewhat portable, unlike a true permanent, standby generator. They’re surprisingly economical, too. Our 7200 costs less new than a 3000-watt inverter generator, but it’ll power everything in our house including the well pump, HVAC system, freezers, water heater, and stove.
But it won’t run it all at once. It’s critical to learn how to use your generator and “game” your circuit breakers ahead of an emergency. For example, running multiple lights, fans, small appliances, and the HVAC all at once generally isn’t a problem with the 7200. But if I know if we’re going to be taking showers—which calls for hot water and the well pump, both of which require higher voltage—I turn the water heater on long enough to heat a full tank, shut off the HVAC temporarily, and avoid running water to keep the well pump from kicking on while the tank is heating. Once we have hot water, I turn off the water heater breaker, but ensure the pump is on, so that everyone can then take a fast shower before the water in the tank cools.
Generators don’t do any good if you don’t have fuel, or if they won’t start when you need them. I run both of my generators for several minutes at least once per month. I use non-ethanol gasoline, treated with fuel stabilizer, in them exclusively. I change the oil and inspect the air filters and spark plugs in them annually. I keep at least 15 gallons of fuel handy at all times, and after three months, I burn that fuel in my pickup, 4-wheeler, lawnmower, or boat and replace it with fresh fuel.
Though we realistically only need our big generator on rare occasions, we ran it for days on end following December 10, and I had it plugged in and ready ahead of time that night. Earlier that afternoon, long before it started raining, I started it and ran it for a while, just to be sure it was warmed up and ready. That night, the storms roared through and the power went out. When things quieted, I turned on my flashlight, started the generator with one pull, and flipped the transfer switch. The lights, TV, and internet came on. At that apocalyptic moment, the comfort that came from knowing we were OK and also had heat, hot water, and working appliances was indescribable. The 7200 has a 7-gallon fuel tank and will run all night on a fill-up just before bed.
Check the Tornado Bug-Out Gear
It was 70 degrees the afternoon of December 10. The next morning, after the tornados passed, it was downright frigid. The instability caused by an exchange of warm and cold air is, after all, what causes tornados.
I saw many people who lost everything and were left with nothing to wear but the clothes on their backs, and whatever they could find in the wreckage. We didn’t keep tornado safety bug-out bags back then, but we do now. We have backpacks ready to go with clothing including good insulated gear, rain gear, socks, boots, underwear, towels, and toiletries, along with some basic supplies like bottled water, first aid kit, basic medicines, glasses and contact lenses, flashlights, a camp stove, a few dehydrated meals, cooking gear, tools, firearms, and ammunition.
Gas Up the Chainsaws
The Stihl MS180 is not a big saw, but a pair of them was all the author needed to help with cleanup after a tornado. Stihl
A sharp and reliable chainsaw is high on my list of must-have tools—and one I used for days on end while helping with clean-up efforts in Dawson Springs. My go-to saws for that were a pair of Stihl MS180s. These are small saws, with 16-inch bars, but most of the immediate clean-up work following a tornado is clearing large limbs and treetops out of roadways and driveways, so that vehicles can get through. It can be delicate work, too; I cut trees that were draped over cars, tangled in fences, and wrapped in downed powerlines. I knew the potential for hitting an obstruction and getting a kick-back were high, so that’s one reason why I preferred the smaller saws. Also, when you’re cutting smaller stuff for hours on end, you’re less fatigued by a smaller, lighter saw. If your chain is sharp, you can still handle larger logs in a pinch, too.
Having two saws of the same size allowed me to carry a couple extra chains that would work for either saw. When one of them ran out of fuel or bar oil, I simply swapped and ran the other while the first cooled. It’s important that you understand and accept the risk of running a saw in these conditions if you plan to do so, and make sure you have the proper safety gear ahead of time.
Tornado Safely Relies on People Having the Right Attitude
Following a natural disaster, there’s an assumption that the authorities will be along soon to help. The reality is, in a small country town, you’ll probably be depending on yourself and your neighbors for a long time before the officials get there. Police, fire fighters, the National Guard, FEMA, the governor, and even the president all visited Dawson Springs in the days after December 10. But minutes after the storm, long before any authorities arrived, locals laced up shoes, grabbed headlamps, and started helping their neighbors. There are stories of injured people being carried to the school—which served as a makeshift hospital that night—in tractor buckets.
When I showed up with chainsaws and some supplies for donation in my truck, I first went to one of the local churches, where I knew a high-school friend of mine had been helping organize some relief efforts. I asked him where I could help, and he pointed out across the town, rubble and downed trees as far as we could see. “There’s nobody running things here, man,” he said. “You know your way around. Go find somebody who needs help. There are plenty of them.”
Just a few of many homes destroyed in the Dawson Springs, KY, tornado. Will Brantley
And so, that’s what we did. My wife and I parked at the city park, grabbed the chainsaws and our packs with supplies, and we started walking. We cut trees out of roads and driveways as we went, watching overhead for hazards and praying that the power lines we were stepping around were indeed dead. When we encountered people, which actually wasn’t often, we asked if they were OK, and if they needed help cutting up trees. Many of them did.
One day, we cut the top out of a huge maple that had fallen on a green minivan. After we cleared the limbs away, a guy drove up the road on a skid steer and pushed the trunk out of the way. He was from Pennsylvania, and had loaded his machine and driven through the night to help people in a little town that he’d never seen.
Maybe it was a foolhardy approach, clearing downed trees in a situation where there was no phone service, and where first responders were undoubtedly tied up elsewhere. I suppose, from a liability standpoint, I should even recommend that you don’t do such a thing, and leave it to the professionals instead. But then again, the professionals can’t be everywhere. It’s ultimately your call. But standing shoulder-to-shoulder with self-reliant strangers, who didn’t show up for money or to promote a cause or to do anything other than to help their fellow man, was one of the few good things I saw in the aftermath of the tornado.
Rebuilding After a Tornado
Years later, I’d like to tell you that Dawson Springs is rebuilt and thriving, but that wouldn’t be true. No doubt, some nice homes have gone up in areas where the previous ones were destroyed. But the city park, a former centerpiece of the town that was once lined with towering oaks and hickories, and alive with a pool and ballfields and playgrounds, still looks like a big, vacant field with mangled tree stumps, empty concrete slabs, and a few piles of bricks from the old dugouts. In a small town where many of the residents lived below the poverty line, a number of homes were uninsured and so may never be replaced.
The truth is, it’s impossible to “be ready” for something like that. Being prepared is as good as you can get.
Paracord, short for parachute cord, is a versatile tool that every outdoor enthusiast should keep handy, especially when venturing into the backcountry. This lightweight nylon rope was initially used in the suspension lines of parachutes during World War II, but has since become a staple in survival and outdoor communities. With a core made of several yarns and a woven exterior sheath, it’s not just strong; it’s also durable and flexible.
The real beauty of paracord lies in its versatility and the sheer number of uses it offers to anyone in the wild. Here are 25 uses to help meet a diverse set of outdoor needs.
25 Ways to Use Paracord
1) Bushcraft Wood Vice
A paracord vice. Jennifer Caudill
This simple vice can be a game-changer for carving or holding items still, making it easier to work on detailed projects in nature. Couple your paracord, a toggle, and a split stump to form a great vice.
2) Tripod Assembly
The author lashed this tripod with p-cord. Jennifer Caudill
This DIY tripod can be a central part of your campsite, serving multiple purposes and simplifying your setup. Wrap your paracord around the three legs and then between them to make them more secure.
3) Adjustable Pot Hang
Use paracord to hang pots over a fire. Jennifer Caudill
This method allows for precise cooking temperatures, making your wilderness meals tastier and safer to prepare. Using a slip knot, you can lower or raise your pots quickly.
4) Woodsman’s Seat
Have a seat. Jennifer Caudill
This homemade seat adds comfort to your campsite and keeps you clean and dry from the damp forest floor. Parcord keeps the three legs together. Just cut three strong branches to about thigh height and wrap with paracord about 1/3 the way down from the top.
5) Knife Handle Wrap
That’s a wrap. Jennifer Caudill
This addition secures your grip and personalizes your knife, making it uniquely yours.
6) Survival Trapping
It’s a trap! Jennifer Caudill
Mastering this technique could be vital for food procurement in prolonged survival situations, making it an essential skill. The paracord serves well as a connector to the branch, serving as an engine for the trap. It can also work as the slip knot, although wired “grabbers” are better.
7) Prusik Knots for Gear
The Prusik is an essential knot to know. Jennifer Caudill
These knots add a layer of safety and reliability for securing gear, especially in challenging environments. Prusik knots slide easily and hold fast with pressure.
You can use paracord to make lanyards, survival bracelts, key chains, or as a wrapped handle on a knife. Jennifer Caudill
8) Compass Lanyard Replacement
This bright lanyard ensures you won’t lose your compass, a crucial navigation tool when needed.
9) Survival Bracelets
This wearable kit ensures you always have essential survival tools, regardless of your adventures. Woven with a cobra stitch, you can include micro survival supplies like a jutte, a button compass, a ferro rod, and more.
10) Key Fob
This practical and stylish paracord key fob ensures you can easily find your keys in a backpack or deep pocket. It can also be woven to include extra supplies.
11) Gear Customization
his not only strengthens your gear but also allows you to customize the look and feel of your equipment. You can add S hooks, clips, and more to attach gear wherever and whenever, and also have paracord for its multi-use capabilities.
12) Visibility for Gear
This tactic reduces the chance of losing essential tools, saving time and frustration during outdoor activities. In the photo, I have included an orange paracord, which I have seen numerous people lay down after starting a fire. The added visibility makes it easier to keep up with.
13) Wood Carrier
Work smarter, not harder. Jennifer Caudill
This method makes transporting firewood back to camp less of a chore and more of a quick, simple task. Tie to end together with your favorite knot to create a large loop. Wrap around your firewood and stick one end through the other for a quick grab handle.
14) Knife Tether
A knife tether increased grip strength. Jennifer Caudill
Use a paracord through the lanyard hole to increase grip strength and efficiency. I prefer to slip my thumb through rather than my hand so that if I drop a knife, it does not swing back and cut me.
15) Zipper Pulls
Tie p-cord to a zipper for a handy pull. Jennifer Caudill
This minor modification makes zippers easier to use in cold weather or when wearing gloves, a simple but significant improvement.
16) Tool Roll Cinch
It’s a cinch. Jennifer Caudill
This keeps your tools neatly organized and accessible, making any task or repair in the field quicker and easier. I typically use a timber hitch and a quick slip knot for easy access.
17) Tent Stake Upgrade
Strengthen a tent stake with parachute cord. Jennifer Caudill
This increases the reliability and functionality of your tent stakes, ensuring your shelter stays secure in all conditions. Paracord also comes in reflective and glow-in-the-dark versions.
18) Animal-Proofing Supplies
Hang time. Jennifer Caudill
This practice protects your food and gear from curious wildlife, protecting you and the animals. If you hang it from animals that climb trees, put it on a branch away from the primary stem.
19) Versatile Fastener
Parachute cord lasts a long time in the elements. Jennifer Caudill
This method of attaching items is solid and secure and prevents damage to the natural surroundings. I used it here to fasten a bird feeder hanger to a tree. Since paracord is pliable yet durable, it lasts long and does not cut into the tree.
20) Mapping Distances
Measure a route on a map with an inner strand of parachute cord. Jennifer Caudill
This practical use of paracord helps you plan your travels accurately, ensuring you can gauge distances and plan accordingly. Lay a piece of cordage along a curvy road, river, or trail. Mark the ends and transfer that to your map scale to get an approximate distance.
21) Gear Organization
High and dry. Jennifer Caudill
Keeping your gear off the ground protects it from dampness and critters and helps maintain a tidy campsite. Paracord and carabiners are great for hanging nearly anything up and out of the way for easy access.
22) Fire Tinder
In an emergency, you can use p-cord as fuel for a fire. Jennifer Caudill
An alternative tinder source can make starting a fire much more accessible and crucial for warmth and cooking in the wilderness. Jutte twine is better cordage for this purpose, but since you will have paracord with you, it is an emergency fuel.
23) Emergency Belt
The survivor’s utility belt. Jennifer Caudill
if your belt is lost or forgotten, you can use a paracord to hold your pants up or gear to you for easy access.
24) Hat Tether
Never lose your lid again. Jennifer Caudill
This simple solution can prevent you from losing your hat and protect you from the sun or cold. It is convenient for paddling, biking, or anytime winds can be an issue.
25) Dental Floss
Dental hygiene matters—even in the woods. Jennifer Caudill
This innovative use of paracord’s inner strands highlights its versatility, proving useful even for outdoor personal hygiene.
Conclusion
Each use demonstrates Paracord’s adaptability and essential nature in outdoor situations. Whether crafting, repairing gear, or setting up camp, paracord is a reliable resource that enhances safety, convenience, and effectiveness in the wilderness. Its lightweight design, strength, and flexibility make the paracord a must-have item in any adventurer’s pack, proving its value repeatedly across a wide range of applications. Paracord comes in many different lengths, colors, and even strands. Some paracord companies include strands of fishing line, jute, fire cord and more inside of the outer sheath as well. Whether you wear it, store is, or leave it in the toolbox, paracord can help in numerous situations.
With tourists just starting to arrive in Yellowstone National Park, park officials have already announced the first animal attack of the season. According to a National Park Service press release issued last night, 40-year-old Clarence Yoder of Idaho Falls, Idaho initiated an altercation with one of the park’s largest and most formidable critters while under the influence of alcohol.
The incident happened seven miles east of the Yellowstone’s West Entrance, near the town of West Yellowstone, Montana. “Rangers responded to the area after receiving a report of an individual who harassed a herd of bison and kicked a bison in the leg,” the press release states. Yoder was gone by the time they got there, but rangers spotted the vehicle he was traveling in exiting the park and pulled the car over in West Yellowstone.
Yoder was arrested in West and hit with four charges: Being under the influence of alcohol to a degree that may endanger oneself, disorderly conduct as to create or maintain a hazardous condition, approaching wildlife, and disturbing wildlife. “The driver of the vehicle Yoder traveled in, 37-year-old McKenna Bass, of Idaho Falls, was also arrested and cited for driving under the influence, interference for failure to yield to emergency light activation, and disturbing wildlife,” the release goes on to state.
Surprisingly, Yoder only sustained minor injuries after provoking the bison, but the rangers did transport him to a nearby medical facility for evaluation and treatment. After that, he was shuttled off to the Gallatin County Detention Center in Bozeman. He appeared in court on Monday, April 22 and pled not guilty to the charges. The incident is still under investigation, park officials say, but Yoder could end up with $20,000 in fines and two years in jail if convicted of all four violations.
Adult bison can weigh anywhere from 1,000 to 2,200 pounds. Despite their massive size, the animal’s are impressively agile and capable of quick bursts of speed that exceed 40 miles per hour. “This is the first reported incident of a visitor being injured by a bison in 2024,” NPS said in its press release. “The last reported incident occurred on July 17, 2023. There was one reported incident in 2023 and three in 2022.”
Here’s some hair-raising proof that you never want to be between a mother grizzly bear and her cubs. The short video clip, posted to Instagram by Viral Hog just a few hours ago, shows a grizzly galloping toward a slow-moving pickup then barreling through a barb wire fence before before bluff charging the truck and veering off.
“I got four grizzly bears running down the road in front of me,” the driver can be heard saying at the beginning of the clip. “A big sow and three cubs.” At first, all four bears dip through the fence and into a snow covered field after seeing the truck on the road. But then sow comes racing back toward the truck.
“She’s not very happy. Look at her charging me,” the driver says, beeping his horn at the massive bear. Running at full speed, the giant bear leaps into the air and gracefully slides through the a gap in the barbed wire before continuing on toward the truck. “She’s mad,” the driver says. “That was cool.”
Cool from the safety of a pickup perhaps, but the amazing video footage is a sobering reminder of how quickly a sow grizz can close the gap when it feels like its cubs are being threatened. After the grizzly came just a feet from pummeling the truck’s side panel, it darted back into the field to join its cubs in a clump of alder brush. According to Yahoo News, the incident took place in Alberta, Canada.